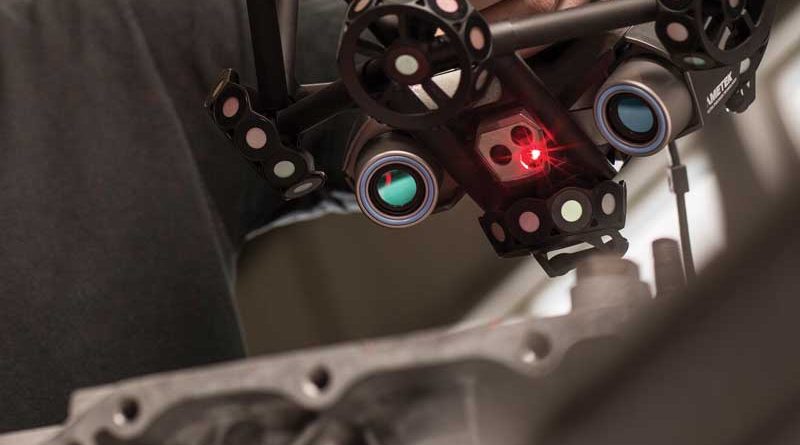
Accuracy: 3D scanning in the quality control
Today’s industry experts are placing their trust in 3D scanning, and granting it a significant role in quality control. Creaform explains why it happens: it ensures high accuracy, it provides more information and it’s easy to use, but not only
by Guillaume Bull
Due to its high accuracy, probing gained the approval of quality control and quality assurance professionals over the last few decades. However, even more players in the industry are now moving toward 3D scanning, which was once reserved for product development. The primary reason for placing probing and 3D scanning at the same level of preference is that the latter has reached a level of accuracy that approaches traditional probing methods. In addition, 3D scanning provides quality control and quality assurance professionals with more data, more details, and more information, which also motivate them to opt for this technology.
What led to the increasein 3D scanning accuracy?
The capacity of a 3D scanner depends on the components inherent in its design. Cameras and advances optical calibration techniques, which are important components of a 3D scanner, have acquired a significant resolution, while light sources have also become better defined. These improved components result in higher accuracy.
Nevertheless, 3D scanning is not going to stop improving. The same as computers, innovation will continue to respond to industry challenges.
Need for Automation and no experience required
The industry of tomorrow is moving toward automated quality control. In Industry 4.0, where the entire manufacturing process is connected, integrated, and automated, 3D scanning is better suited than probing to inspect parts as they are manufactured. Indeed, 3D scanners can quickly capture a lot of data, which are essential to the 4.0 manufacturing process.
In addition, a coordinate measuring machine (CMM) requires the intervention of a high-quality workforce with both the training and the experience to maneuver a probing system. These experts, who are essential to the proper functioning of probing tools, are sometimes difficult to find. With the latest 3D scanners, however, operating or programming experience is not specifically required. 3D scanning, therefore, is accessible to all.
Design-oriented geometry
Companies want to distinguish themselves from the competition by their design-oriented geometry and form. They develop parts with various shapes, sizes, and finishes. Inspecting those complex geometries require a multitude of high data quality easily accessible with 3D scanning.
Now that the range of accuracy granted by 3D scanning exceeds the threshold required for quality control and that its development helps to respond to industry challenges, all the benefits of the technology, such as its speed, ease-of-use, and portability, can be applied to improve the quality of products and the work of quality control professionals.
The benefits of portability
3D scanners are tools designed to be portable. They can be moved on the production floor, go where the part is, and perform inspections in unstable environments. Unlike fixed CMMs, they do not require a dedicated room, do not have to be fixed to the floor or placed in a controlled environment.
With portable measurement tools, the manufactured part does not have to be brought to the measurement system. Only very high tolerance inspections can be directed to and measured with probing.
Therefore, it is possible to control the preliminary and intermediate stages of the production process as well as all the small deformations that can occur during the manufacturing steps.
With probing, however, it is more complicated to understand, due to the lack of data, the effects of a stamping or a folding that could have deformed or twisted other sections of the part.
Ease-of-use and speed
With a 3D scanner, the user simply has to point and shoot. Not only is the tool easy to handle, but also its data is simple to interpret. A colormap provides a quick visualization of the part deformations. This feature enables users to easily see if it is within the required tolerances, or if it has been deformed or twisted. Measurement points are obtained and visualized more easily than with a CMM, which does not provide a visual interpretation and takes time to capture, analyze, and portray the information. As a result, 3D scanning allows for parts to be adjusted easily and quickly.
In addition, the ability of 3D scanners to capture a lot of points combined with the ability of computers to process a lot of data makes calculations faster. This increased capacity will not stop, as the speed of data processing will continue to increase with the evolution of the technology. Indeed, the sensors that comprise a 3D scanner already offer better accuracy and better resolution than those developed a decade ago. Added to this are the continued improvements to computers’ processes and capacities for analysis.
Enormous potential to be unlocked
Probing is already a mature technology, while 3D scanning has enormous potential, as many engineers work to innovate it. Although the levels of resolution and accuracy are already high, they will continue to evolve, which will bring even more data, more details, and more information. This will open the door to inspecting even more complex parts. We are on the increase slope of the innovation curve. One day, we will surely be able to control 100% of parts. Quality control calls for inspections on 100% of dimensions on 100% of parts. The more you control parts, the less you have to rebuild them. This means fewer material losses, fewer rejections, and fewer returns. We are on our way to perfect parts.
Compared to fixed CMMs, 3D scanners are not only cheaper to buy but, as we have seen, they measure faster and require less expertise. As a result, less time is spent on each part, with less specialized resources, while spending less money on technology.
Conclusions
A 3D scanner is an essential tool in the quality control toolbox. It is not meant to replace everything, but it is there to offload the CMM, to do more with complex geometries, and to reserve the CMM for the few points that require a critical accuracy. This is how the alliance of the two technologies provides a perfect solution.
Since the majority of inspections can now be performed with a 3D scanner, why not use a tool that offers a good ROI and leave delicate and important features to probing. This complementarity between 3D scanning and probing proves to be a winning combination, until 3D scanning reaches and surpasses the level of accuracy offered by probing.

