Investing in Precision
For forty years FARO has been producing radial and axial bearings up to 2,200 mm in diameter, with product customisation as its main strength. In order to pursue the objectives of ever-increasing precision and quality, the company based in Calendasco, near Piacenza, has recently invested significant resources in both production machinery and metrology.

With its strong know-how in the manufacture of radial and axial bearings up to 2,200 mm in diameter, FARO has product customization as its main strength. Faro studies, designs and manufactures its products based on the customer’s technical specifications, representing an effective alternative for users and manufacturers who cannot find valid solutions to their technical needs among the standard products offered by the market. This is possible thanks to the production flexibility and technological skills acquired in forty years of activity. With the aim of continuously improving, the company has decided to invest both in the production department, with new grinding machines, and in the metrology room with new three-dimensional measuring machines. The new equipment was purchased in 2019 and became operational last year.

The workshop has been expanded with new grinding machines
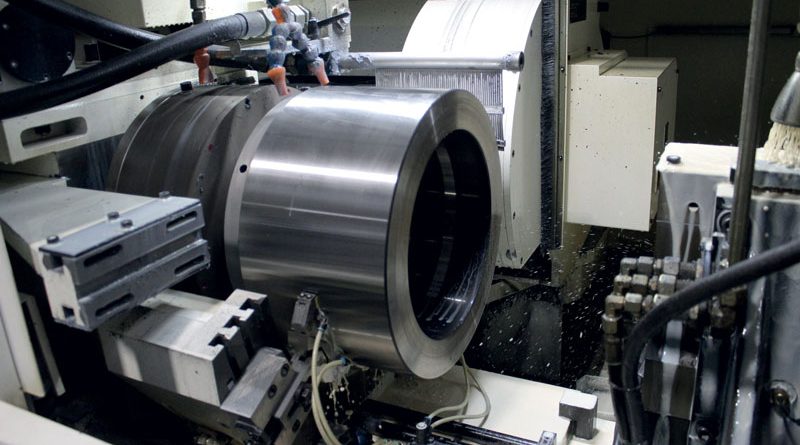
The fleet of machine tools has been expanded with two new grinding machines, which allow higher machining accuracy. The NOVA – NOVAMATIC PGE external grinding machine is a machine designed to meet very high production volume and quality requirements. It is used for the production of rings with diameters from 150 to 450 mm and a grinding wheel band of 220 mm. The machine enables workpiece centring by means of a sliding block system which allows rapid loading/unloading of items to be machined, guaranteeing precision and repeatability of machining. Alessandro Fumi, Faro’s Technical Manager, explained the reasons which led to this investment: “The two new machines are designed to perform machining operations more effectively, more precisely and above all faster. Specifically, the NOVA – NOVAMATIC PGE external grinding machine is designed to produce bearings for Sendzimir rolling mills, with diameters of up to 400 mm and heights of over 200 mm. The production of these parts currently accounts for 25% of our turnover, so it is essential to have the production capacity to meet demand. Going into technical detail, when grinding outside diameters wider than the grinding wheel which the machine can accommodate, the wheel itself has to oscillate; on the other hand, with the new machine equipped with a grinding wheel with a height of 250 mm, it is possible to carry out plunge grinding without oscillating the wheel itself. This reduces machining times and increases precision”.
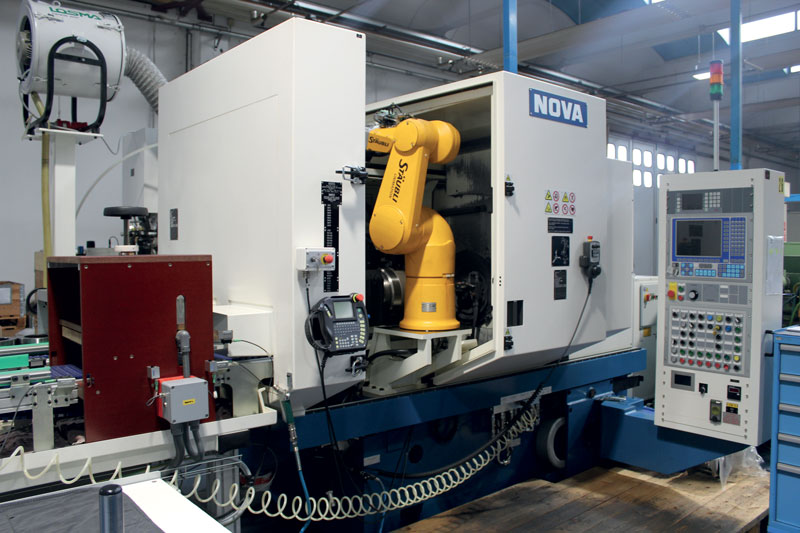
The NOVA – NOVAMATIC 4GP internal grinding machine, which is capable of machining medium to large sized parts requiring high rigidity of the main machine units and large work volumes, is also designed for this type of product and is used by FARO for the production of rings with diameters from 50 to 300 mm and a grinding wheel band of 150 mm. In addition to a sliding block centering system, the machine is equipped with a robotic system for the automatic loading and unloading of the parts: once the machine has been set up, the operator simply has to load the magazine and the machine performs the machining operation independently.

Investments focusing on precision also in the metrology area
All machining carried out in the production department is controlled by a 100 m2 advanced metrology laboratory built within the factory, but in an isolated facility equipped with controlled temperature chambers. The decision to invest in control with two new measuring machines was a response to a need which arose over the last couple of years. “Until a year ago,” Alessandro Fumi explained, “we were equipped to check parts up to 1,500 mm in diameter; for larger dimensions we used manual equipment or relied on external suppliers: a bottleneck which had to be avoided”.
The first fixture, a ZEISS – PRISMO ULTRA 3D, is a bridge measuring machine made of carbon fibre and ceramic composite materials. The equipment uses computer-guided corrections of all dynamic influences on the machine, thereby optimising accuracy during high-speed scanning. The accuracy achieved in measurements is in the tenth of a micron range. Equipped with an integrated RT-AB rotary table supported by air bearings, it combines perfect motion with extremely accurate detection of shape values and extends the monitoring capability to a diameter of up to 1,000 mm.
“Besides being a classic three-dimensional inspection machine,” Fumi continued, “the ZEISS PRISMO ULTRA 3D is equipped with a geometric control system and serves as a roundness gauge for large dimensions and heavy weights. Before investing in the new machine, we were equipped with roundness gauges for measuring parts up to 600 mm in diameter and weighing up to 35 kg. However, our activities for rolling mills involve the production and revamping of the counter rolls, which are characterised by the highest rotational accuracy and a weight which can even exceed one hundred kilograms, even with a diameter of around 400 mm. The new machine allows us to perform all the necessary checks on parts with a diameter of up to one metre and weighing more than a hundred kilos”. Even the second machine we installed is by ZEISS, ACCURA model, also in a bridge configuration. It is made of steel and aluminium with a control field extended to the maximum dimensions of 2,000×2,400×1,000 mm, with an active fixed measuring head of high precision and stability. With this new generation machine, equipped with advanced systems, FARO has achieved its objective of fully covering its production requirements, in a sector where precision and quality are increasingly important.

