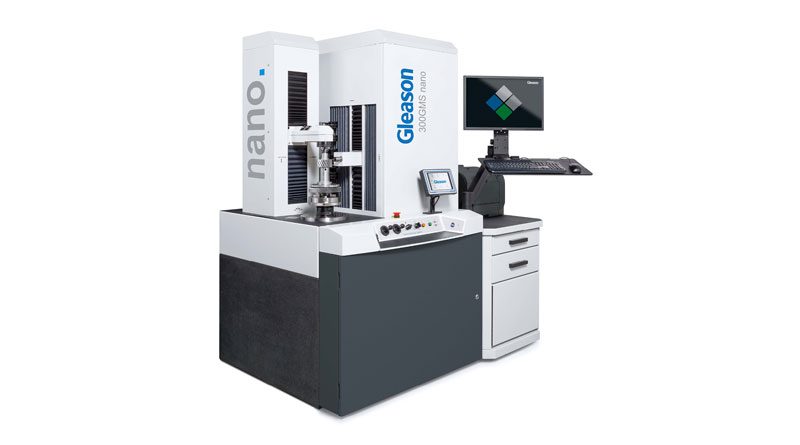
Quiet gear inspection? The solution is 300GMS Nano
Gleason presents its latest developments to meet the challenges of extreme gear quality and minimum gear noise. Its brand-new 300GMS nano Gear Metrology Center, is among the highlights. This center is capable of measuring gears at sub-micron level, executing advanced waviness analysis and evaluating gear noise. It is ideally suited to support automotive e-drive production.
With its brand-new 300GMS nano Gear Metrology Center, Gleason presents a world- first at Control Show 2022, May 03-06, Stuttgart, Germany. The capability of measuring gears at sub-micron level, executing advanced waviness analysis and evaluating gear noise using the most advanced analytical tools, make the 300GMS nano ideally suited to support automotive e-drive production with minimum noise requirements.

The full range of gear inspection capabilities is covered by 300GMS nano
The 300GMS nano covers the full range of modern gear inspection capabilities, as well as fine pitch gear inspection and CMM measurement. With the 300GMS nano, users are now able to measure surface finish at sub-micron level with a skidless probe, meeting the most common roughness parameters as defined by DIN, ISO, ANSI and others, analyze waviness for profile, lead and pitch, and execute noise analysis with sophisticated software tools. The 300GMS nano is equipped with high accuracy SP25 3D scanning probe with a broad range of styli, including its own stylus calibration library. The 300GMS nano also integrates 3D measurement and analysis capabilities typically offered by a CMM.
In addition to gears and other rotary parts, the 300GMS nano inspects a wide range of gear cutting tools including hobs, Power Skiving, shaper and shaving cutters, bevel cutter stick blades, most broaches and rack cutting tools. The system comes with Gleason’s patented AOP (Advanced Operator Pendant), which enables users to record video memos, leave voice messages, monitor environmental conditions, read bar and QR code information directly into the system, and supports remote services.
The machine uses the latest GAMATM 3.2 Applications and Control Software, fully compatible with Windows, connecting easily to customers’ servers. GAMA also includes SPC data acquisition software and Gleason Connect® Remote Support Services.
In-process gear inspection with laser technology: innovation by Gleason
The GRSL Gear Rolling System with integrated Laser Technologyoffers revolutionary in-process gear inspection of up to 100% of gear production, setting a new standard for applications requiring high-speed, high-volume testing. It provides both double flank roll testing as well as laser inspection to provide measurement on all teeth in just seconds. GRSL is available in manual, semi-automatic or fully automatic configuration depending on the manufacturer’s requirements and measures external cylindrical gears up to 250 mm in diameter and ranging from .4 to 7.2 module. It provides analytical output on all teeth for profile, lead and index with functional characteristics including nick detection, total composite variation, total runout, tooth to tooth average, DOP, average circular tooth thickness and more. Capabilities also include integrated gear noise analysis tools, making the GRSL ideally suited to meet automotive e-drive requirements.
Gleason’sClosed Loop enables both the GMS Series and GRSL to send inspection results directly to Gleason production machines, including Power Skiving, grinding and honing machines, for auto-correction of production variables without the need for operator intervention.
Expanding mandrels for metrology applications
Next to its new metrology centers, Gleason presentsLeCount® Expanding Mandrels, specifically developed for metrology applications, guarantee precision and boost measuring efficiency. Gleason will also showcase its range of high-precision master gearsfor calibration, inspection and checking applications to provide a complete, worry-free metrology system from one source.

